
Ingredients
Units
For the Cakesicles
- 1, 9x13 baked cake or 2, 8" rounds (any flavor)
- 2-4 Tbsp frosting
- Silicone cakesicle molds
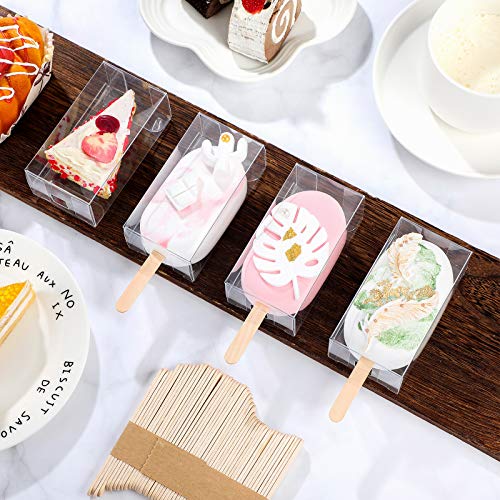
- Small popsicle sticks
- 30-35 oz of coating (Wilton Candy Melts or chocolate chips)
Small Batch Frosting
- 4 Tbsp butter (softened, unsalted or salted is fine)
- 1 c powdered sugar
- 1/4 tsp vanilla extract
- 2-4 tsp milk, more if needed
Instructions
- In a small bowl, mix together all the frosting ingredients until light and fluffy.
- Remove the edges from the baked cake, as you don’t want any crust in your cakesicles.
- Add the cake to a large bowl. Break up the cake into large pieces or crumbles.
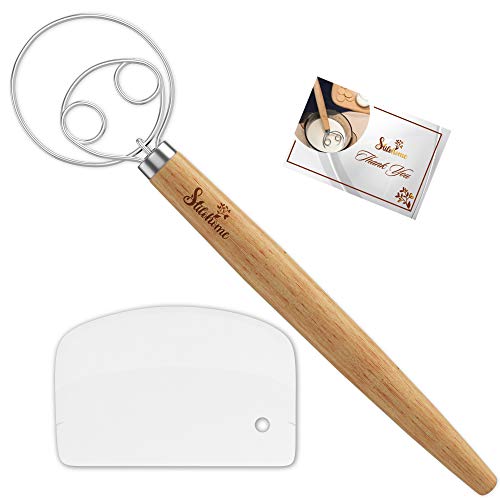
- Add the frosting, starting with 2 tablespoons. Mix using a spoon or spatula (a Danish whisk works perfectly here!)
- Test the mixture to see if it holds a ball shape when squeezed together. If the cake seems too dry, add another tablespoon of frosting. Mix. Note, you probably won't use all of the frosting from the recipe above.
- Repeat until cake mixture is soft and moldable. It should not be overly greasy or wet.
- Set aside.
- Melt the candy melts or chocolate in the microwave at 15 second increments (stirring in between) until fully melted.
- Add about 1 1/2 tablespoons of candy melts or chocolate to each of the mold cavities.
- Using one of the popsicle sticks, a mini-spatula or food-safe paint brush, spread the coating in the silicone mold evenly. Ensure that the entire mold (and sides) are coated well. If the consistency of the candy melts is too thin, be sure to re-coat the sides multiple times.
- When finished, insert and pull out a popsicle stick into the slots of each cavity, to create an opening for later. This ensures the opening is not blocked with the coating.
- Place the molds in the fridge to chill for 15-20 minutes or until set.
- When ready, gently press the cake into each of the molds, leaving a 1/16" gap between the top of the cake and the edge of the mold. Do not overfill with cake.
- Smooth out the top of the cake with your fingers or the back of a spoon.
- Add a dollop of the melted coating to the top of the cake and spread smooth.
- Using a bench scraper or back of a flat knife, scrape the whole top of the mold, pushing off any excess coating. You should be left with a flat top of coating on top of each cakesicle.
- Insert the popsicle sticks into the openings and into the cake. Point slightly downward as you insert it to ensure a secure fit.
- Chill for 15-20 minutes or until set.
- If coating on top of the cake looks messy and not flat (which can happen if the molds were overfilled with cake), grab a knife and heat it up in hot water. Dry it off and smooth out the coating.
- To remove the cakesicles, stretch the sides of the mold away from the cake. Gently push underneath (the front of the cakesicle) and pop it out.
- Since the stick was inserted into the little opening, you have to maneuver that separately. Be careful not to push the stick upward, as it can slide further into the cakesicle and poke out the other side.
- Avoid touching the surface/front of the cakesicle.
- If there is any excess coating on the edges, it can be cut away using a sharp knife.
- Decorate as desired with drizzled chocolate, candy melts, premium sprinkles, luster dust and more.


Notes
Recipe by Owlbbaking.com
You could flavor the frosting with other flavors, but in my opinion it's really not necessary. You only need a small amount so it won't impact the overall taste much if you added different extracts etc. The cake flavor is what comes through most!
If any areas of the shell cracked off while removing from the molds, don't fret! Simply touch up with a bit of melted coating. Don't forget, you can always cover any mess ups areas with sprinkles or other décor too.
- Prep Time: 60 minutes
- Chill Time: 30-40 minutes total
- Cook Time: 0 minutes
- Category: Cake
- Cuisine: American